Welcome to our ultimate DIY Hydroseeding Guide for New Zealand! If you’ve ever dreamed of achieving a lush, green lawn without the high cost of professional services, hydroseeding might be the perfect solution. This cost-effective and efficient method combines grass seed, mulch, fertilizer, and water into a slurry that is sprayed onto your soil for quick and even germination. Whether you’re starting a new lawn, repairing patches, or looking for an eco-friendly alternative to traditional seeding, this guide will walk you through every step of the process—from choosing the right grass seed for NZ’s climate to ensuring proper maintenance for long-lasting results. Get ready to transform your outdoor space with a beautiful, thriving lawn—all while saving money and taking pride in your DIY skills!
DIY hydroseeding is an effective and budget-friendly way to establish a healthy lawn in New Zealand. This process involves spraying a mixture of grass seed, mulch, fertilizer, and water onto prepared soil for fast, even germination. Ideal for both new lawns and patchy areas, hydroseeding offers quicker results than traditional seeding and costs significantly less than sod. To get started, choose the right grass seed for NZ’s climate, prepare your soil, mix the hydroseeding slurry, and apply it evenly. Regular watering and proper maintenance will ensure strong growth within weeks. Learn more about how to hydroseed your lawn successfully.
Table of Contents
What Is Hydroseeding And Why Is It Popular In NZ?
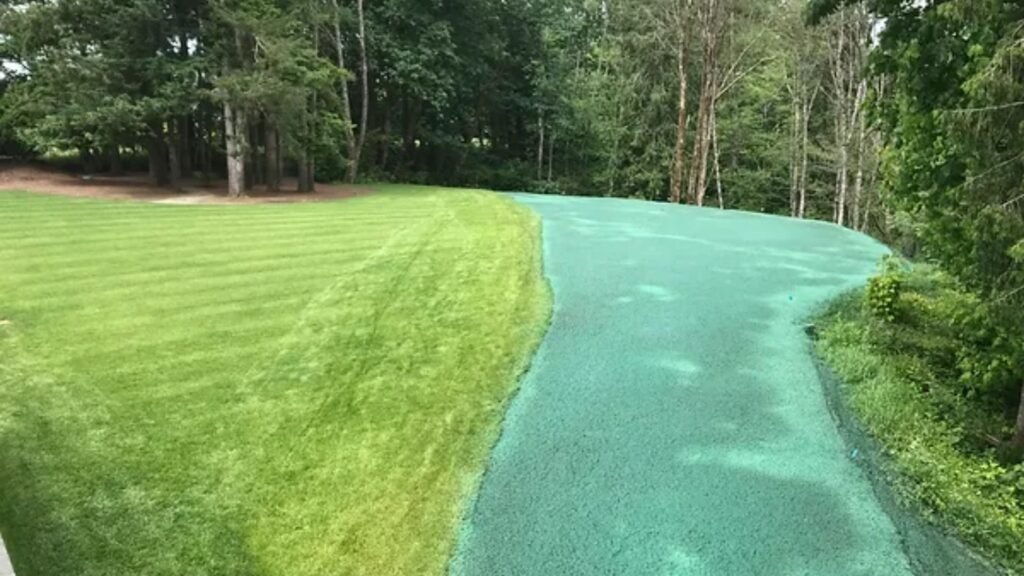
Hydroseeding is an advanced grass seeding method that has gained significant popularity in New Zealand due to its effectiveness, cost-efficiency, and ability to establish lush, even lawns quickly. Unlike traditional seeding or turf laying, hydroseeding involves spraying a slurry mixture of grass seed, water, mulch, fertilizer, and a tackifier (a binding agent) onto the soil. This method promotes rapid germination and healthy grass growth while protecting the seeds from erosion, harsh weather, and birds.
New Zealand’s diverse climate and varied terrain make hydroseeding an excellent choice for homeowners, landscapers, and land developers. Whether you live in the humid, coastal regions of the North Island or the cooler, drier areas of the South Island, hydroseeding offers a flexible and efficient way to establish a lawn that thrives in your specific environment.
Why is Hydroseeding Popular in New Zealand?
Hydroseeding has become increasingly popular in New Zealand due to its ability to address common challenges associated with traditional lawn establishment. Here are some of the key reasons why many Kiwis are choosing this method over conventional seeding or turf laying:
Faster and More Even Germination
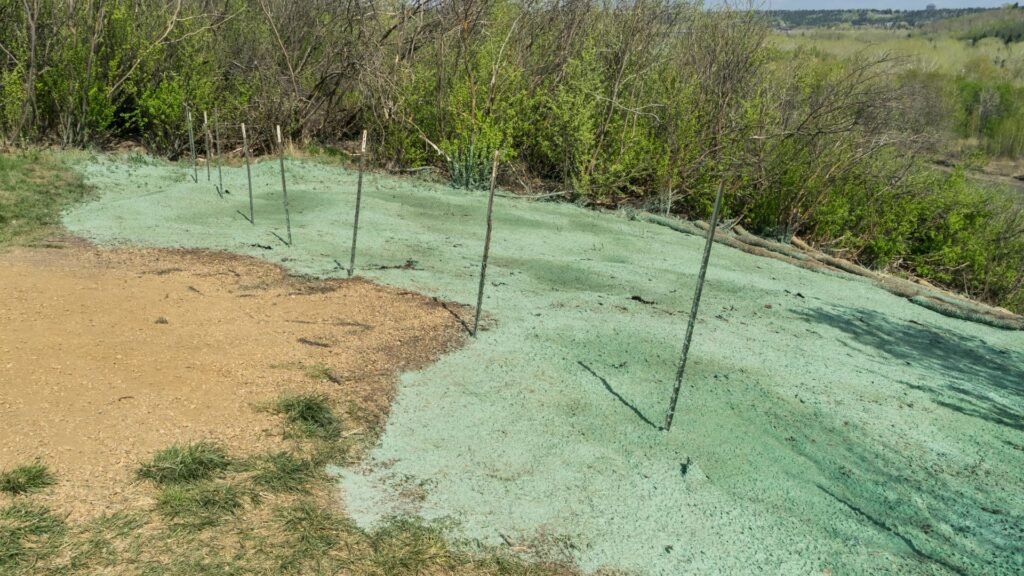
One of the biggest advantages of hydroseeding is its ability to promote rapid and uniform germination. The slurry mixture ensures that the seeds are evenly distributed across the soil surface, preventing patchy growth. The mulch component retains moisture, creating an ideal environment for seed germination, which typically begins within 5 to 7 days. In contrast, traditional seeding methods often result in uneven growth due to inconsistent watering and seed dispersal.
More Cost-Effective Than Turf Laying
For homeowners looking to achieve a professional-quality lawn without the high price tag, hydroseeding is a budget-friendly alternative to turf laying. While installing sod (pre-grown grass rolls) provides instant greenery, it can be extremely expensive, especially for larger areas. Hydroseeding offers a middle ground—it costs more than traditional hand-seeding but significantly less than sod, making it an attractive option for both residential and commercial properties.
Ideal for New Zealand’s Unique Climate
New Zealand’s weather conditions vary greatly across the country, with some regions experiencing high rainfall and others prone to drought. Hydroseeding helps counteract these extremes by incorporating moisture-retaining mulch, which protects seeds during both wet and dry periods. Additionally, it allows for the customization of seed mixtures to suit different climates, ensuring optimal lawn growth regardless of location.
Prevents Soil Erosion and Stabilizes Slopes
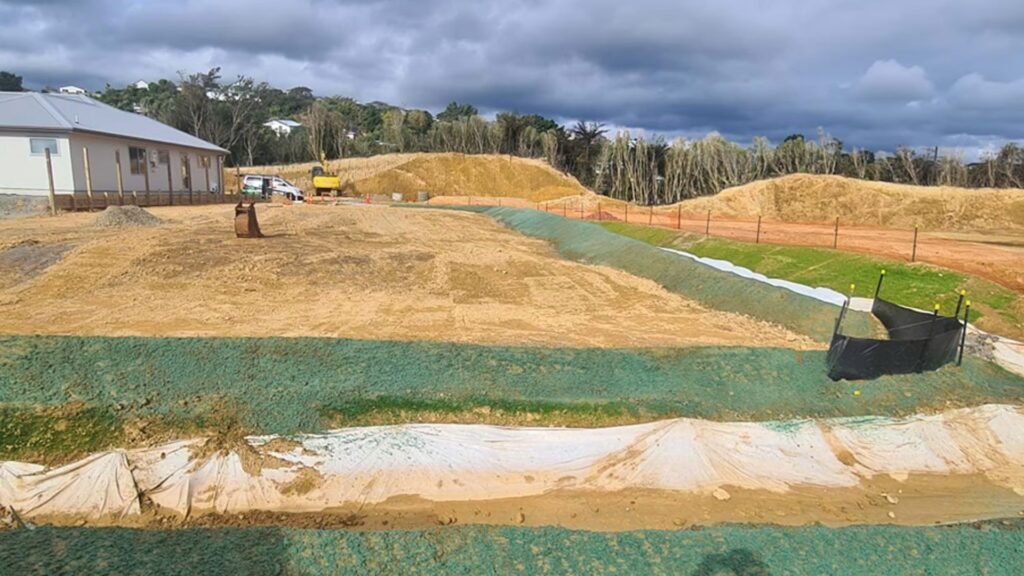
In areas with loose or sloped soil, erosion can be a major problem, particularly in New Zealand’s hilly regions and coastal areas. Hydroseeding is widely used for land rehabilitation and erosion control because the tackifier in the slurry binds the mixture to the soil, preventing washout. This makes it an excellent choice for properties located on hillsides, new construction sites, or areas affected by landslides or heavy rainfall.
Customizable Grass Seed Selection for Local Conditions
Unlike pre-grown sod, which comes in limited varieties, hydroseeding allows homeowners to choose grass species tailored to their region. For example:
- In cooler regions like Canterbury and Otago, perennial ryegrass and fescue are popular choices due to their resilience in lower temperatures.
- In warmer regions like Auckland and Northland, kikuyu and couch grass are preferred for their drought resistance and ability to thrive in sandy soils.
- In coastal or native landscapes, native grasses can be incorporated for a more eco-friendly approach that blends seamlessly with the environment.
How Does Hydroseeding Compare to Traditional Seeding and Turf Laying?
When deciding between hydroseeding, traditional hand-seeding, or sod installation, it’s essential to understand the differences in terms of cost, time, maintenance, and overall effectiveness.
Hydroseeding vs. Traditional Seeding
Traditional seeding involves manually spreading grass seed over prepared soil, followed by watering and fertilizing. While this is the cheapest method, it comes with several downsides:
- Seeds are exposed to wind, birds, and runoff, reducing germination success.
- Uneven growth can lead to patchy lawns.
- Requires more frequent watering and longer germination times.
Hydroseeding, on the other hand, provides better seed protection, improved moisture retention, and faster, more uniform growth. The mulch in hydroseeding helps regulate soil temperature and keeps the seeds in place, making it a more reliable option.
Hydroseeding vs. Turf Laying (Sod Installation)
Laying pre-grown sod is the quickest way to get an instant green lawn, but it comes with a hefty price tag and certain risks:
- Sod is expensive, especially for large properties.
- It requires immediate and intensive watering to establish roots properly.
- Poorly installed sod can lead to gaps, uneven surfaces, or root failure.
Hydroseeding offers a cost-effective balance between affordability and efficiency. While it takes a few weeks for the grass to fully establish, it provides long-term success with deeper root systems, making it more sustainable than sod in the long run.
Hydroseeding is revolutionizing lawn care in New Zealand by providing a practical, efficient, and cost-effective way to establish healthy, vibrant grass. Whether you’re looking to improve your backyard, restore land after construction, or stabilize soil on slopes, hydroseeding offers a customizable and environmentally friendly solution. Its ability to thrive in different climates, prevent erosion, and promote even growth makes it an ideal choice for homeowners and landscapers alike.
By understanding the benefits of hydroseeding and how it compares to other methods, you can make an informed decision about whether it’s the right option for your lawn. If you’re ready to start your DIY hydroseeding project, be sure to choose the best grass seed for your region and follow proper maintenance practices for long-lasting results.
Pros And Cons Of DIY Hydroseeding
Hydroseeding has gained popularity as a cost-effective and efficient way to establish a healthy lawn, especially for homeowners in New Zealand. While it offers significant benefits, it also comes with a few challenges that DIY enthusiasts need to consider. Below is an in-depth breakdown of the advantages and potential drawbacks of DIY hydroseeding, ensuring you have a clear understanding before starting your lawn project.
Advantages of DIY Hydroseeding
Cost-Effective Compared to Hiring Professionals
One of the biggest reasons homeowners choose to hydroseed their lawns themselves is the cost savings. Professional hydroseeding services in New Zealand can cost anywhere from $1,000 to $3,000, depending on the size of the area. In contrast, a DIY approach can be done for a fraction of that price—typically between $140 and $450, depending on whether you rent or purchase equipment and the type of grass seed you choose. By doing it yourself, you eliminate labor costs and have full control over the budget, making it a more affordable way to achieve a lush lawn.
Customizable Mix Based on Regional Climate
New Zealand has a diverse climate, ranging from cool and temperate conditions in the South Island to warmer and more humid conditions in the North Island. With DIY hydroseeding, you have the flexibility to choose the perfect grass seed blend tailored to your region’s specific needs. Whether you need drought-resistant fescue for dry areas, fast-germinating ryegrass for cooler regions, or a hardy kikuyu mix for coastal climates, you can customize your hydroseeding mixture to match local weather patterns and soil conditions. This ensures your lawn thrives in your specific environment, unlike pre-made commercial blends that may not be ideal for your location.
Faster Germination and More Uniform Coverage
Compared to traditional seeding, hydroseeding promotes quicker germination and more even distribution of grass seed. The slurry mixture contains mulch and tackifier, which help retain moisture and prevent seed displacement, ensuring uniform growth. Most hydroseeded lawns begin to sprout within 5–7 days, while traditional seeding can take up to three weeks for noticeable growth. The even application also reduces patchiness, leading to a fuller, more consistent lawn without the gaps often seen in hand-seeded areas. If done correctly, hydroseeding can produce professional-quality results in less time, making it an attractive option for DIY enthusiasts.
Challenges of DIY Hydroseeding
Requires Proper Preparation and Knowledge
While hydroseeding is more efficient than traditional seeding, it still requires thorough preparation to ensure successful results. Before applying the slurry, homeowners need to properly prepare the soil by clearing debris, leveling the ground, and, in some cases, conducting soil tests to ensure the right pH balance and nutrient levels. Additionally, mixing the right ratios of grass seed, fertilizer, mulch, and water is essential for optimal germination. Without the proper knowledge or research, mistakes such as using too much or too little mulch, over-seeding, or poor soil preparation can result in uneven growth or poor grass establishment.
Equipment Investment or Rental Costs
DIY hydroseeding requires specialized equipment to spray the seed mixture evenly across the soil. Homeowners can choose to rent a hydroseeder or use a hose attachment designed for small-scale hydroseeding. Renting a hydroseeder in NZ can cost between $50 and $200 per day, while purchasing one can range from $500 to over $2,000. While the rental cost is still lower than hiring a professional, it is an additional expense that should be factored into the overall budget.
Additionally, accessories such as protective gear, hoses, and nozzles may be needed for efficient spraying. For those planning to hydroseed large areas or multiple times, purchasing a hydroseeder may be a worthwhile investment, but for a one-time project, renting may be the more cost-effective choice.
Growth Results Vary Based on Weather and Soil Conditions
One of the biggest challenges of hydroseeding—whether DIY or professional—is that success heavily depends on environmental conditions. Grass seed requires consistent moisture, optimal temperatures, and well-prepared soil to germinate properly. If the weather is too dry, windy, or rainy after application, the hydroseed mixture can wash away, dry out too quickly, or fail to adhere properly to the soil.
Additionally, soil composition plays a key role in grass establishment. Poor-quality soil lacking nutrients or organic matter may require extra preparation, such as adding compost or soil amendments, before hydroseeding. If these factors are not addressed beforehand, the lawn may experience patchy growth or take longer to establish.
Is DIY Hydroseeding Worth It?
DIY hydroseeding is a fantastic way to save money while achieving professional-quality lawn results. It provides fast germination, better moisture retention, and uniform grass coverage, all while allowing customization based on your region’s climate. However, it does require careful planning, soil preparation, and proper application techniques to be successful.
For homeowners willing to invest time in research, soil preparation, and proper watering, DIY hydroseeding can be a highly rewarding and cost-effective solution. However, for those who prefer a more hands-off approach or lack the necessary equipment, hiring a professional may be the better option.
By understanding the pros and cons of DIY hydroseeding, you can make an informed decision and take the right steps toward growing a healthy, green lawn that lasts for years.
Tools & Materials Needed For DIY Hydroseeding In NZ
Hydroseeding is an efficient and cost-effective way to establish a lush, green lawn, but having the right tools and materials is crucial to achieving successful results. Whether you’re working on a small patch of land or a large area, using the correct equipment and supplies will ensure even application, proper germination, and healthy grass growth. Below, we break down the essential tools and materials needed for a DIY hydroseeding project in New Zealand.
Essential Equipment
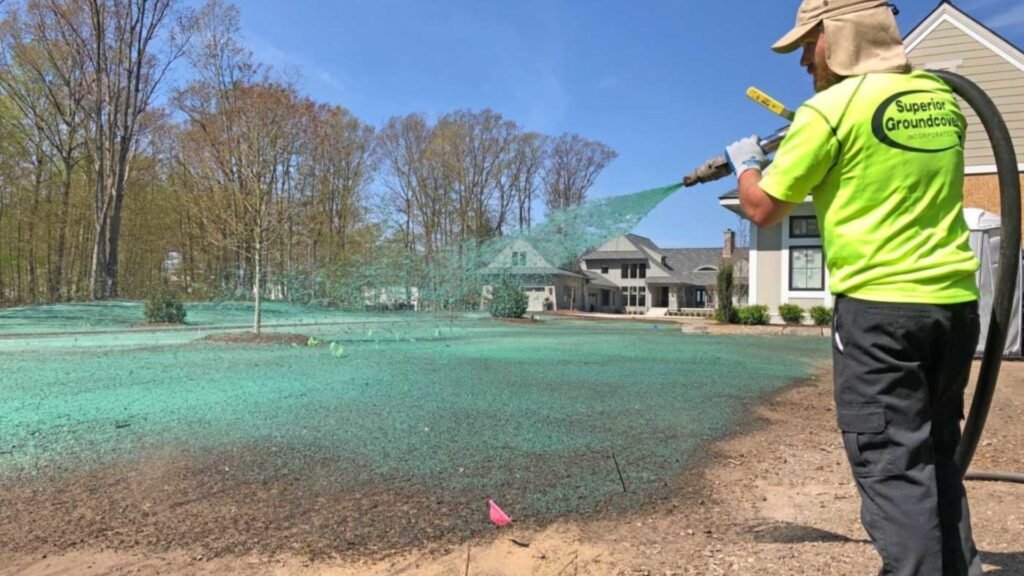
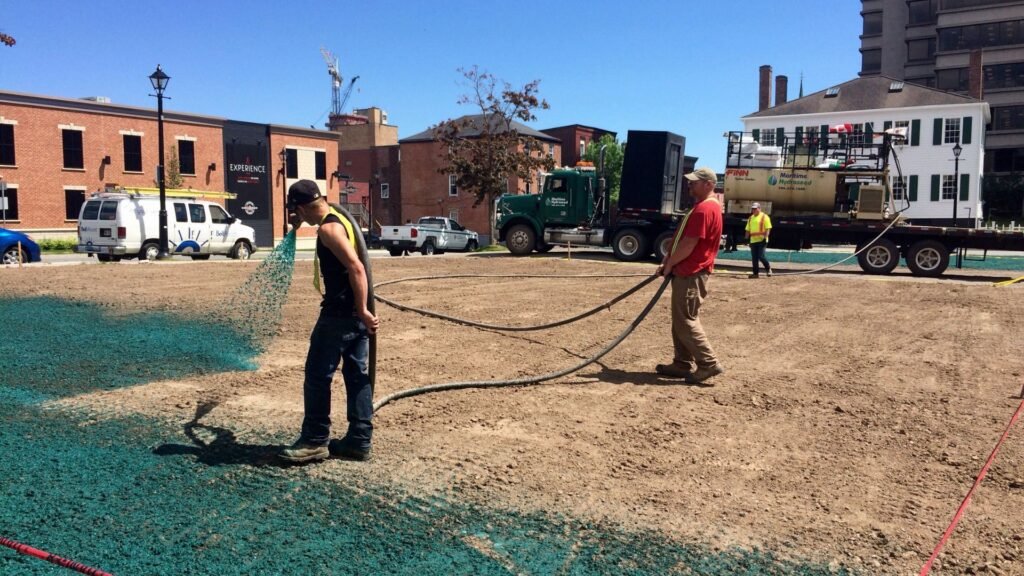
Hydroseeder (Purchase or Rent)
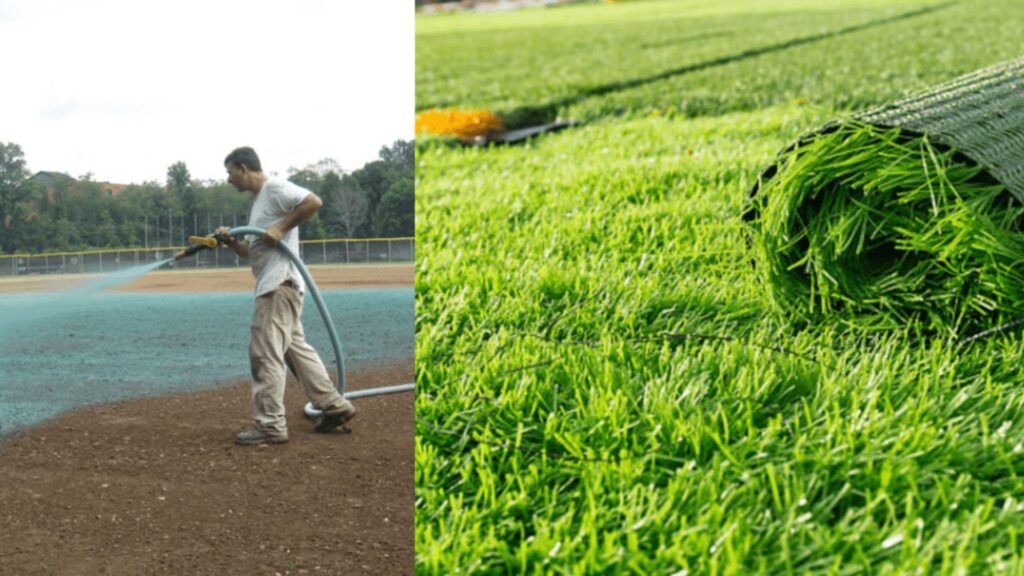
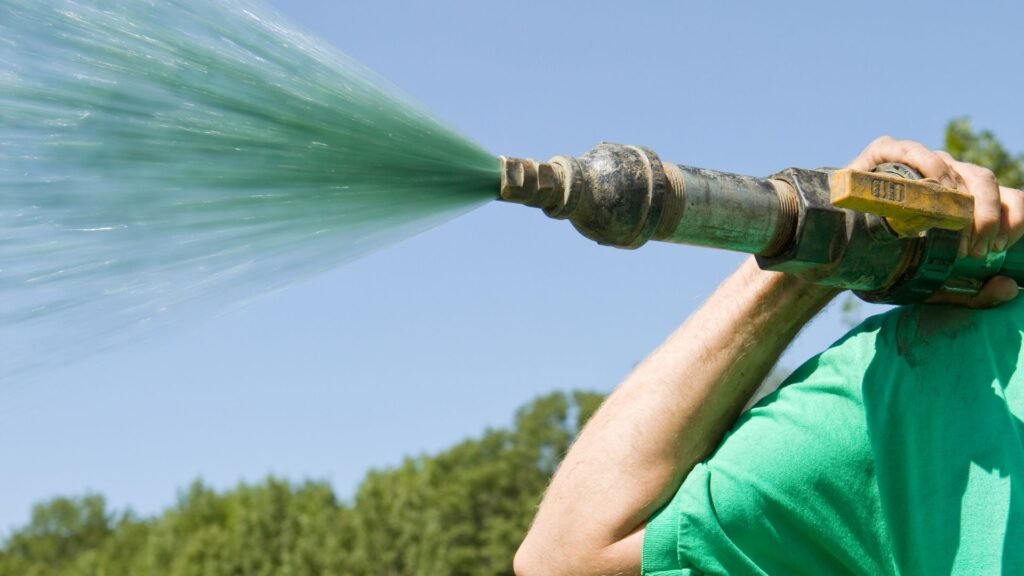
A hydroseeder is the primary tool used for applying the hydroseeding mixture. This machine evenly sprays the slurry of seed, mulch, fertilizer, and water onto the soil, ensuring uniform coverage. While commercial hydroseeders can be expensive, many equipment rental stores in New Zealand offer cost-effective daily or weekly rental options. If you plan to hydroseed a large area or intend to use it multiple times, investing in a personal hydroseeder might be worth considering.
For smaller lawns or patch repairs, handheld hydroseeding sprayers can be attached to a garden hose. These are more affordable and user-friendly for homeowners tackling a DIY project.
Garden Hose with Spray Attachment (For Smaller Areas)
If you’re covering a small section of your yard, a garden hose with a hydroseeding attachment can be a practical alternative to a full-scale hydroseeder. These attachments are designed to mix water with the seed and mulch slurry, allowing for a controlled and even application. Ensure that the hose has sufficient water pressure to distribute the mixture effectively.
Protective Gear (Gloves, Mask, and Goggles)
While hydroseeding is a relatively safe process, wearing protective gear is highly recommended. Gloves protect your hands from prolonged exposure to the slurry mix, a mask prevents inhalation of airborne mulch particles and fertilizer dust, and goggles shield your eyes from potential splashes. These precautions are especially important if you are working with commercial fertilizers or additives that may contain fine particles or mild chemicals.
Materials for DIY Hydroseeding
Grass Seed (Choosing the Right Type for NZ’s Climate)
Selecting the correct grass seed is critical for achieving a thriving lawn in New Zealand’s diverse climate. The type of seed you choose should be suited to your region’s temperature, rainfall levels, and soil conditions.
- Cool-Season Grasses (Best for Southern NZ & Cooler Regions)
- Perennial Ryegrass – Grows quickly, offering fast germination and a dense, green lawn.
- Fescue (Tall & Fine Varieties) – Drought-resistant and low-maintenance, ideal for shaded areas.
- Warm-Season Grasses (Best for Northern NZ & Warmer Areas)
- Kikuyu – A tough, fast-growing grass that thrives in warm coastal regions.
- Couch Grass – A hardy, drought-tolerant variety requiring minimal upkeep.
If sustainability is a priority, native New Zealand grasses can be a great option, offering environmental benefits and requiring less maintenance once established.
Hydromulch (Wood Fiber or Paper Mulch)
Hydromulch is a crucial component of the hydroseeding mix, acting as a protective layer that helps retain moisture, shields the seeds from harsh weather, and promotes germination. There are two main types of mulch:
- Wood Fiber Mulch – Made from finely processed wood fibers, it provides excellent moisture retention and erosion control. Recommended for larger areas or sloped surfaces.
- Paper Mulch – A more affordable option, suitable for smaller, flat areas where erosion isn’t a major concern.
Choosing the right type of mulch depends on your lawn’s needs, the local climate, and your budget.
Fertilizer (Slow-Release, High-Phosphorus Blend)
Fertilizer is an essential part of the hydroseeding mixture, providing nutrients that encourage strong root development and healthy growth. A high-phosphorus blend is ideal because phosphorus plays a key role in seed germination and early root establishment.
When selecting fertilizer, opt for a slow-release formula to ensure steady nutrient supply over time. Some hydroseeding mixes also include nitrogen and potassium, which further support overall lawn health and resistance to disease.
Tackifier (Binds the Mix to the Soil)
A tackifier is an adhesive agent that helps bind the hydroseeding mixture to the soil, preventing erosion and washout, particularly on sloped areas or during heavy rainfall. It acts as a glue, keeping the seed and mulch in place while also improving soil contact for better germination rates.
Natural tackifiers, such as guar gum or plant-based polymers, are eco-friendly alternatives to synthetic binders. If hydroseeding on a flat, wind-sheltered area, a tackifier may not be necessary, but for areas prone to erosion, it’s a must-have.
Water Source (Consistent Hydration for Germination)
Hydration is the key to successful hydroseeding. Immediately after application, the hydroseeded area must remain consistently moist to support germination. Watering lightly 2–3 times per day in the first two weeks helps keep the mulch from drying out and ensures the seeds stay active.
Having a reliable water source, whether through an irrigation system, garden hose, or sprinkler setup, is necessary for maintaining consistent moisture. Avoid overwatering, as it can cause the seeds to wash away or create uneven growth patches.
Having the right tools and materials is the foundation of a successful DIY hydroseeding project. Investing in quality grass seed, mulch, and fertilizer tailored to New Zealand’s climate ensures healthy, even lawn growth. Proper equipment, from hydroseeders to protective gear, makes the process smoother and more efficient. With careful preparation and consistent aftercare, you can achieve a professional-quality lawn at a fraction of the cost.
Would you like additional guidance on sourcing hydroseeding materials in New Zealand? Explore our range of high-quality grass seeds, mulch, and fertilizers to get started on your DIY hydroseeding journey.

Choosing The Best Grass Seed For NZ’s Climate
Selecting the right grass seed is one of the most important steps in DIY hydroseeding. The success of your lawn depends on choosing a variety that thrives in your specific region’s climate, soil type, and maintenance level. New Zealand’s diverse weather patterns mean that different regions require different grass types. Whether you live in the cooler South Island or the warmer North Island, understanding which grass seed works best for your conditions will ensure a lush, long-lasting lawn.
Cool-Season Grasses (Best for Southern NZ Regions)
Cool-season grasses are ideal for areas that experience colder winters and moderate summers. These grasses grow actively in spring and autumn while slowing down in the heat of summer. They provide rich, green coverage throughout most of the year and are well-suited for places like Otago, Canterbury, and Southland.
Perennial Ryegrass – Quick Germination and Durability
Perennial ryegrass is one of the most popular grass types for cooler regions due to its rapid germination and dense growth. It establishes quickly, often within 5–10 days, making it an excellent choice for homeowners who want fast results.
Key Benefits:
- Quick germination, ideal for hydroseeding
- Resistant to wear and tear, making it great for high-traffic areas
- Thrives in moderate to cool temperatures
- Provides a deep green, fine-textured lawn
Best For: Homeowners looking for a lawn that establishes quickly and can withstand foot traffic, such as families with kids or pets.
Fescue – Drought-Resistant and Low-Maintenance
Fescue is another great option for southern regions, particularly because of its deep root system that enhances drought tolerance. It grows more slowly than ryegrass but requires less water and fertilizer over time.
Key Benefits:
- Stays green longer during dry periods
- Tolerant of moderate shade, making it versatile for various landscape conditions
- Low-maintenance with minimal mowing and fertilizing needs
Best For: Homeowners who prefer a more self-sustaining lawn with lower water consumption while still maintaining an attractive, green appearance.
Warm-Season Grasses (Best for Northern NZ Regions)
Northern New Zealand has a warmer, more humid climate, especially in areas like Auckland, Northland, and Bay of Plenty. Warm-season grasses thrive in these conditions as they are heat-tolerant, drought-resistant, and grow actively in the summer months.
Kikuyu – Thrives in Warm, Coastal Areas
Kikuyu grass is one of the most durable and fast-growing warm-season grasses, making it ideal for coastal and sunny areas. Its aggressive growth helps it outcompete weeds and quickly cover bare patches, which makes it a good choice for DIY hydroseeding.
Key Benefits:
- Highly resistant to heat and drought
- Quick growth and recovery from damage
- Tolerates sandy and coastal soils
- Requires less fertilization than cool-season grasses
Best For: Homeowners in warm coastal areas who want a low-maintenance, durable lawn that can handle frequent use.
Couch Grass – Low-Maintenance and Hardy
Couch grass is another top choice for warmer NZ climates. It’s a low-growing, fine-textured grass that provides a dense and attractive lawn with minimal care. While it takes longer to establish than Kikuyu, it has excellent drought resistance and stays green throughout most of the year.
Key Benefits:
- Thrives in full sun with minimal water
- Forms a dense, carpet-like turf that resists weeds
- Withstands heavy foot traffic
- Requires less mowing than Kikuyu grass
Best For: Homeowners looking for a low-maintenance, heat-tolerant lawn that requires less frequent mowing and can withstand heavy foot traffic.
Native Grass Options for Sustainability
If you’re looking for an eco-friendly and sustainable alternative, consider New Zealand native grasses. These grasses are naturally adapted to NZ’s environment and require less water, fertilizer, and maintenance compared to introduced species. They also provide a unique and natural-looking lawn that blends seamlessly with native landscapes.
Popular Native Grass Varieties:
- Poa Cita (Silver Tussock) – A fine-textured, drought-tolerant grass ideal for low-maintenance lawns.
- Carex Species – Hardy, adaptable grasses that thrive in various soil conditions.
- Microlaena Stipoides (Weeping Grass) – A versatile native grass that grows well in both sun and shade.
Best For: Homeowners who prioritize sustainability, biodiversity, and lower maintenance requirements while still maintaining a healthy and natural-looking lawn.
How to Choose the Right Grass Seed Based on Local Conditions
With so many grass types available, it’s important to select a variety that suits your specific climate, soil, and lifestyle. Here are some key factors to consider when choosing the best grass seed for hydroseeding in NZ:
- Climate & Temperature – Cooler regions in the South Island require cool-season grasses like ryegrass or fescue, while warmer regions in the North Island are better suited for warm-season grasses like Kikuyu or Couch Grass.
- Sunlight Exposure – Some grasses, such as Couch Grass, need full sun, while others, like Fescue, tolerate partial shade. Consider how much sun your lawn will receive throughout the day.
- Soil Type & Drainage – Sandy, coastal soils are best for Kikuyu, while heavier clay soils benefit from Perennial Ryegrass or Native Grass options. Conducting a soil test can help determine the best seed for your lawn.
- Water Availability – If you live in a drought-prone area, opt for drought-resistant varieties like Fescue or Couch Grass to reduce water consumption.
- Maintenance Preferences – Some grasses, such as Perennial Ryegrass, require frequent mowing, while Couch Grass and Native Grasses are lower-maintenance and require less frequent care.
- Lawn Usage – If you have kids or pets, you’ll need a hard-wearing grass like Perennial Ryegrass or Kikuyu, which can recover quickly from foot traffic.
Choosing the right grass seed for hydroseeding in New Zealand is key to creating a healthy, thriving lawn. Whether you’re in the cooler southern regions or the warmer northern areas, selecting a grass variety suited to your climate, soil type, and maintenance preferences will ensure long-term success. If you’re aiming for fast results, Perennial Ryegrass is an excellent choice. For a low-maintenance and drought-resistant lawn, Fescue, Couch Grass, or Native Grass options may be the best fit.
By understanding New Zealand’s diverse climate conditions and choosing the appropriate seed, you’ll set the foundation for a lush, green lawn that lasts year-round.
Step-By-Step DIY Hydroseeding Process
Hydroseeding is a highly effective way to grow a lush lawn quickly and affordably. However, to achieve the best results, it’s crucial to follow a structured process. This step-by-step guide will walk you through preparing your lawn, mixing the hydroseeding slurry, applying the mixture, and ensuring proper post-seeding care.
Step 1: Prepare Your Lawn for Hydroseeding
Before applying hydroseed, proper site preparation is essential for healthy grass growth. A well-prepared lawn bed ensures that the hydroseeding slurry adheres to the soil and provides the necessary nutrients for germination.
Remove Weeds, Rocks, and Debris
Start by clearing the area of any existing vegetation, rocks, and debris. Weeds can compete with the newly hydroseeded grass for nutrients, so it’s best to remove them completely. If you have persistent weeds, consider applying an organic herbicide a few weeks before hydroseeding. Avoid chemical herbicides right before seeding, as they can interfere with grass germination.
Level the Ground for Even Application
Uneven soil can lead to water pooling and inconsistent growth. Use a rake or lawn roller to level the ground, filling in any dips or holes. For areas with poor drainage, aerate the soil or mix in organic matter to improve water absorption.
Test the Soil (If Needed)
Testing your soil can help determine its pH level and nutrient content. Grass grows best in soil with a pH between 6.0 and 7.0. If the soil is too acidic or alkaline, consider adding lime or sulfur accordingly. Soil testing kits are available at garden centers, or you can send a sample to a local agricultural lab for a detailed analysis.
Step 2: Mix Your Hydroseeding Slurry
Once your lawn is prepped, the next step is to create a well-balanced hydroseeding mixture. This slurry contains all the essential components needed for seed germination and lawn establishment.
Combine Seed, Mulch, Fertilizer, Water, and Tackifier
The hydroseeding slurry consists of:
- Grass seed: Choose a variety suited for New Zealand’s climate. Perennial ryegrass is ideal for cool-season areas, while kikuyu and couch grass thrive in warmer regions.
- Hydromulch: Acts as a protective layer, retaining moisture and preventing erosion. Common options include wood fiber mulch or paper mulch.
- Fertilizer: A slow-release fertilizer high in phosphorus promotes strong root development.
- Tackifier: A bonding agent that helps the mixture adhere to the soil, reducing runoff and washout.
- Water: Ensures even distribution and activates seed germination.
Follow Recommended Ratios for an Even Spread
The correct mix ratio depends on your hydroseeder type and lawn size. Follow the manufacturer’s guidelines for proper proportions. A general guideline is:
- 10–15 kg of grass seed per 1,000 square meters
- 45–60 kg of mulch per 1,000 square meters
- 4–6 kg of tackifier per 1,000 square meters
- 50–75 liters of water per 1,000 square meters
Mix the ingredients thoroughly to create a uniform slurry, ensuring the seed and nutrients are evenly distributed.
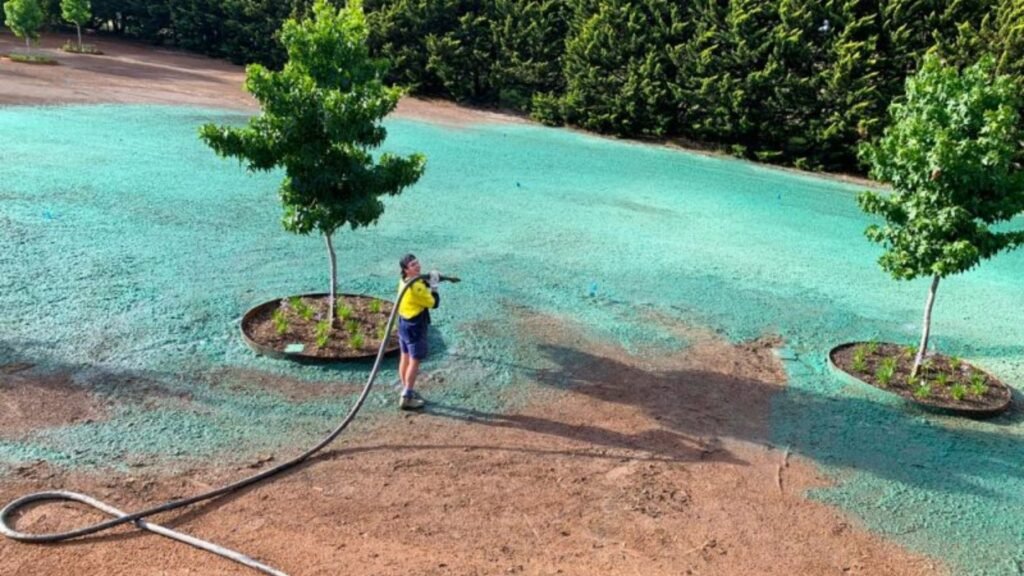
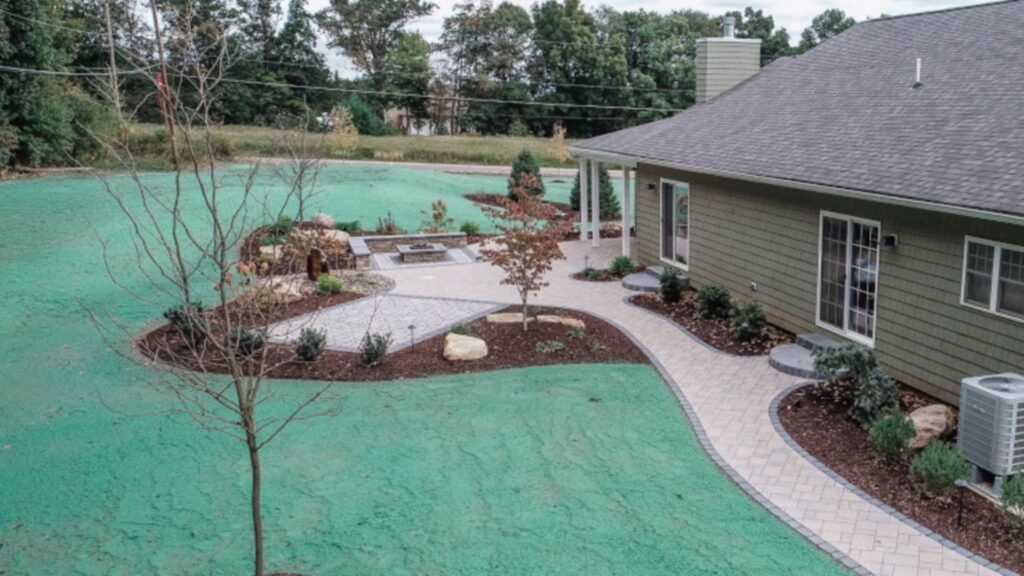
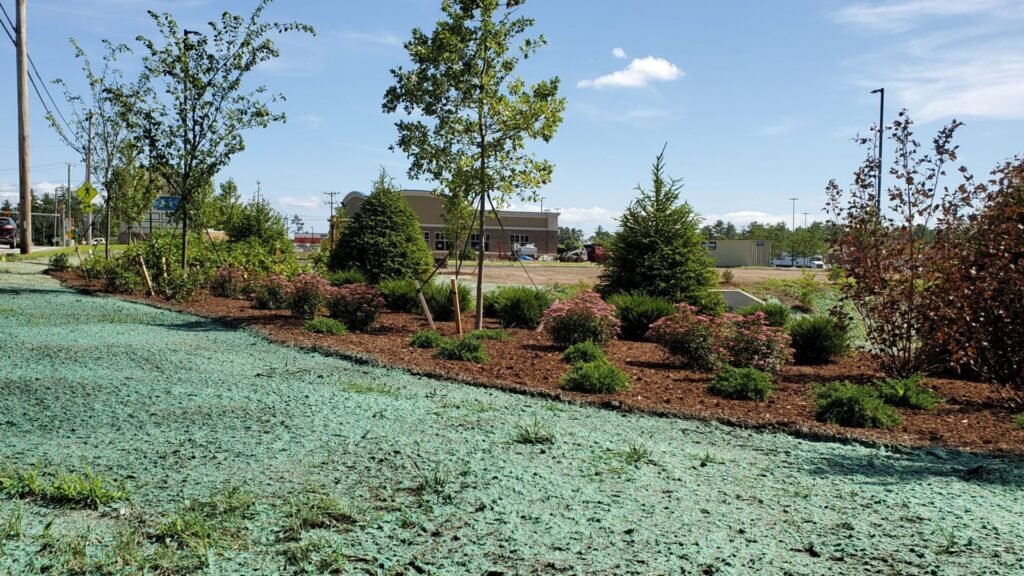
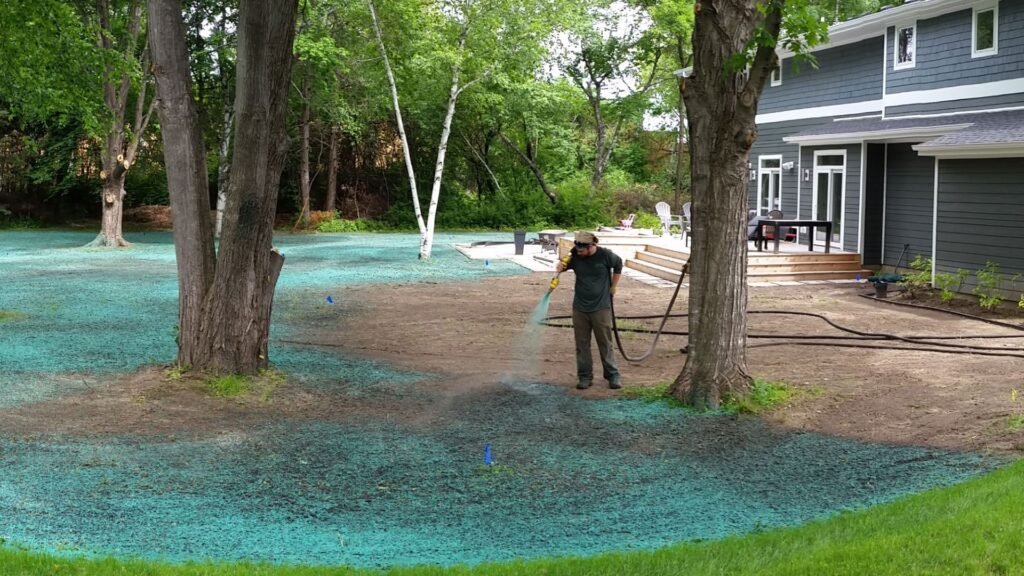
Step 3: Apply the Hydroseed Mixture
Now that your hydroseeding slurry is ready, it’s time to apply it to the lawn. Proper application techniques ensure uniform coverage and promote consistent growth.
Use an Even Spraying Technique for Uniform Coverage
Load the slurry into a hydroseeder and spray it evenly across the prepared soil. Work methodically in sections to avoid oversaturation or missed spots. The goal is to achieve a thin, even coat—too much mixture can suffocate the seeds, while too little can lead to patchy growth.
For smaller areas, a hose-end hydroseeding attachment can be used. Larger lawns may require renting a professional-grade hydroseeder for better coverage.
Apply Under Ideal Weather Conditions
The best time to hydroseed is during mild, calm weather, ideally in early spring or autumn. Avoid applying hydroseed on extremely hot, dry, or rainy days, as harsh conditions can cause washout, seed displacement, or poor germination.
Ideal conditions for hydroseeding include:
- Temperatures between 15–25°C
- No heavy rain forecasted for 48 hours
- Minimal wind to prevent uneven slurry application
Step 4: Watering and Post-Seeding Care
Hydroseeding is just the beginning of your lawn’s growth. Proper watering and maintenance are essential to ensuring strong root development and a thick, healthy lawn.
Water Frequently for the First Two Weeks
Moisture is critical during the germination phase. Water lightly but frequently, about 2–3 times per day for the first two weeks. The soil should remain damp but not saturated.
After the first two weeks, gradually reduce watering to once per day, and after a month, transition to deep watering 2–3 times per week.
Avoid Walking on the Lawn Until It’s Well Established
New grass is delicate and easily damaged by foot traffic. Avoid walking on the hydroseeded area for at least four weeks to allow roots to establish. If necessary, set up temporary barriers to keep pets and children off the lawn.
Monitor for Growth Consistency
After 10–14 days, you should start to see grass sprouting. Over the next few weeks, monitor for even growth and patchy areas. If some sections appear thinner, consider overseeding those spots.
If weeds emerge, remove them carefully by hand to avoid disturbing the young grass. Avoid applying herbicides until the lawn is fully established, typically after 8–10 weeks.
Final Thoughts on DIY Hydroseeding
DIY hydroseeding is an efficient and cost-effective way to grow a thick, green lawn, but success depends on careful preparation, proper mixing, and consistent aftercare. By following these steps—preparing the soil, creating the right hydroseeding mixture, applying it evenly, and maintaining proper watering—you can achieve professional-quality results at a fraction of the cost.
With patience and the right approach, your hydroseeded lawn will establish strong roots and provide long-lasting beauty for years to come.
Cost Breakdown: DIY Vs. Professional Hydroseeding In NZ
Hydroseeding is a cost-effective way to establish a lush, green lawn, but the total expense depends on whether you choose to do it yourself or hire a professional service. In New Zealand, DIY hydroseeding typically costs between $140 and $450, while professional services range from $1,000 to $3,000, depending on factors like lawn size, seed type, and service provider rates. Below, we’ll break down these costs in detail, helping you decide whether DIY hydroseeding or hiring a professional is the better option for your lawn and budget.
Cost of DIY Hydroseeding in New Zealand
For homeowners looking to save money, DIY hydroseeding is an attractive option. The total cost varies based on the size of your lawn and whether you already own or need to rent equipment.
Estimated DIY Costs:
- Grass Seed: $40 – $100 (varies by seed type and lawn size)
- Hydromulch: $50 – $150 (essential for moisture retention and seed protection)
- Fertilizer: $20 – $50 (high-phosphorus fertilizer helps with germination)
- Tackifier (Adhesive): $10 – $30 (binds the slurry to the soil)
- Hydroseeding Equipment Rental: $50 – $200 per day (depends on machine size and rental provider)
If you already have access to a hydroseeder or a suitable spraying system, the cost may be even lower. However, DIY hydroseeding does require time and effort, including soil preparation, mixing the slurry correctly, and ensuring even coverage during application. While it is budget-friendly, improper execution can lead to uneven germination or wasted materials, requiring reapplication and additional costs.
Cost of Professional Hydroseeding in New Zealand
Hiring a professional hydroseeding service eliminates the need for equipment rental and reduces the risk of errors. Professional services typically include the full preparation and application process, using high-quality commercial-grade materials for optimal results.
Estimated Professional Costs:
- Small Lawn (Under 100m²): $1,000 – $1,500
- Medium Lawn (100m² – 300m²): $1,500 – $2,500
- Large Lawn (Over 300m²): $2,500 – $3,000+
Professional hydroseeding companies have access to advanced equipment and high-quality seed blends specifically designed for New Zealand’s climate and soil conditions. They also ensure precise application, reducing the chances of patchy or uneven growth. Many services include follow-up care, such as initial fertilization and guidance on watering schedules.
DIY vs. Professional Hydroseeding: Which One is Right for You?
Choosing between DIY and professional hydroseeding depends on your budget, experience level, and time commitment.
DIY Hydroseeding is ideal for:
- Homeowners looking to save money and willing to invest time into the process.
- Small to medium-sized lawns where even coverage is easier to manage.
- Those who enjoy DIY projects and have access to rental equipment.
Professional Hydroseeding is best for:
- Large properties where precision and speed are critical.
- Homeowners who prefer a hassle-free process with guaranteed results.
- Those with limited time or experience in lawn care.
Ultimately, if budget is a major concern, DIY hydroseeding offers significant savings. However, for those who want professional-grade results with minimal effort, hiring a hydroseeding service can be a worthwhile investment. Either way, proper aftercare—including regular watering, fertilization, and weed control—is key to ensuring a lush, green lawn.

Troubleshooting & Common Mistakes To Avoid In DIY Hydroseeding
Hydroseeding is an efficient and cost-effective way to establish a lush lawn, but like any planting method, it comes with challenges. Many homeowners face issues such as uneven grass growth, erosion, or weed infiltration. Understanding these common problems and knowing how to fix them will help ensure a healthy, green lawn that thrives. Below, we address key troubleshooting tips and mistakes to avoid when hydroseeding your lawn in New Zealand.
Uneven Growth and How to Fix Patchy Areas
Uneven grass growth is one of the most common issues with hydroseeding. If certain areas of your lawn appear sparse or patchy while others flourish, several factors may be at play.
Causes of Patchy Growth:
- Uneven application: If the hydroseed mixture isn’t sprayed consistently, some areas may receive more seed than others.
- Poor soil preparation: Compacted soil can prevent proper root development, leading to uneven coverage.
- Insufficient watering: Dry spots can lead to inconsistent germination.
- Weather conditions: High winds or heavy rain immediately after application can shift seeds, causing gaps.
How to Fix It:
- Overseed Patchy Areas: Once you identify sparse spots, lightly rake the soil to loosen it and apply a fresh hydroseeding mixture to promote regrowth.
- Improve Soil Aeration: If compacted soil is the issue, aerate the affected areas with a garden fork before reseeding.
- Adjust Watering Routine: Ensure you are watering frequently enough to keep the soil moist but not saturated.
- Monitor Weather Forecasts: If heavy rain or wind is expected, delay hydroseeding or use a light covering of straw mulch to help protect seeds.
Preventative Tip: When hydroseeding, make sure to spray evenly in overlapping motions to cover every section properly. Using a tackifier (binding agent) in the mix also helps keep seeds in place for better uniformity.
Hydroseed Washing Away and How to Prevent Erosion
In areas with sloped terrain or heavy rain, erosion can cause the hydroseed mixture to wash away before it has a chance to take root. This is especially problematic for lawns on inclines or near drainage areas.
Causes of Seed Washout:
- Steep Slopes: Gravity pulls the hydroseeding slurry downhill, preventing proper adhesion.
- Heavy Rainfall or Overwatering: Too much moisture before the seeds germinate can wash them away.
- Lack of Tackifier: A binding agent helps the seed mixture stay in place but may be missing or improperly mixed.
How to Prevent It:
- Use Erosion Control Blankets: For sloped areas, lay biodegradable erosion control mats or jute netting over the hydroseeded ground to hold the mixture in place.
- Apply a Tackifier: Always mix a tackifier into the hydroseed slurry to help bind it to the soil, reducing runoff risk.
- Modify Watering Habits: Water lightly but frequently in the first few weeks. Avoid overwatering, which can loosen the seeds.
- Hydroseed in Optimal Conditions: Choose a calm day for application. If rain is in the forecast within 48 hours, delay the process to prevent immediate washout.
Preventative Tip: If your lawn has steep slopes, consider a second application of hydroseeding a few weeks after the first to reinforce weak spots.
Weed Control Strategies for a Healthy Lawn
Weeds can be a major challenge when establishing a new lawn. Since hydroseeding requires keeping the soil consistently moist, it creates an ideal environment for weeds to grow alongside grass seedlings.
Common Weed Issues After Hydroseeding:
- Pre-existing weeds in the soil: If the area wasn’t properly cleared before hydroseeding, weeds may sprout alongside the grass.
- Wind-blown weed seeds: Open soil can attract unwanted weeds carried by wind or animals.
- Using unclean or low-quality mulch: Some mulches may contain weed seeds, leading to unwanted growth.
How to Manage and Prevent Weeds:
- Proper Site Preparation: Before hydroseeding, remove existing weeds manually or use a natural herbicide at least two weeks prior to application.
- Mulch Selection: Choose high-quality hydromulch designed for hydroseeding, as some cheaper options may contain weed seeds.
- Early Mowing: Once your grass reaches about 7.5 cm (3 inches) in height, mow lightly. This helps encourage grass growth while reducing the spread of weeds.
- Wait Before Using Herbicides: Avoid applying weed killers too soon. Most experts recommend waiting at least 6–8 weeks after hydroseeding before using selective herbicides, allowing grass to establish first.
Preventative Tip: A well-maintained lawn naturally suppresses weeds over time. Once the grass is established, regular mowing and fertilization will help keep weeds from competing with your lawn.
Troubleshooting hydroseeding issues early can make all the difference in achieving a thick, healthy lawn. By ensuring proper application, preventing erosion, and managing weed growth effectively, your DIY hydroseeding project in New Zealand will have the best chance for success. If you’re consistent with maintenance and proactive about addressing problems, you’ll enjoy a beautiful, green lawn that thrives year-round.
Ready to create a lush, green lawn without the high cost of professional services? With the right tools, techniques, and expert advice, you can successfully hydroseed your own backyard. Get started today with our top-quality hydroseeding supplies, expert tips, and step-by-step guides.
FAQs: About DIY Hydroseeding Guide NZ
What is hydroseeding, and how does it work?
Hydroseeding is a lawn establishment technique that involves spraying a mixture of grass seed, mulch, fertilizer, tackifier, and water onto the soil. The mulch helps retain moisture and protect the seed while the fertilizer promotes healthy growth. This method results in faster germination and more uniform coverage compared to traditional seeding.
Is DIY hydroseeding cheaper than hiring professionals?
Yes, DIY hydroseeding is significantly more affordable than hiring a professional service. While professional hydroseeding can cost anywhere from $1,000 to $3,000 depending on the size of the lawn, DIY hydroseeding typically costs between $140 and $450, including materials and equipment rental.
What type of grass seed is best for New Zealand lawns?
The best grass seed depends on your region. For cool-season areas (such as the South Island), perennial ryegrass and fescue are ideal choices. In warmer regions (such as the North Island), kikuyu and couch grass thrive better. If you prefer a low-maintenance option, consider native grass varieties.
When is the best time to hydroseed in New Zealand?
The best time to hydroseed in NZ is during early spring (September–November) and early autumn (March–May). These seasons offer optimal temperature and moisture levels for quick germination and strong root establishment.
How long does it take for hydroseeding to grow?
Hydroseeding typically begins to germinate within 5–7 days under ideal conditions. Full lawn coverage is usually achieved within 4–6 weeks, depending on factors such as seed type, weather, and soil conditions.
How do I prepare my lawn for hydroseeding?
To prepare for hydroseeding, clear the area of weeds, rocks, and debris, and ensure the soil is leveled. Loosen the topsoil slightly for better seed penetration and, if necessary, conduct a soil test to determine if additional nutrients or pH adjustments are needed.
How often should I water after hydroseeding?
Keep the newly hydroseeded area moist by watering lightly 2–3 times per day for the first two weeks. Once the grass begins to grow, reduce watering to once per day, and after about four weeks, transition to a deeper watering schedule 2–3 times per week. Avoid overwatering, as it can wash away seeds.
Can I walk on my lawn after hydroseeding?
It is best to avoid walking on the hydroseeded area for at least four weeks to allow the grass to establish strong roots. Walking on the lawn too soon can disturb the germination process and lead to uneven growth.
What common mistakes should I avoid with DIY hydroseeding?
Common mistakes include applying the mixture unevenly, using the wrong seed type, not preparing the soil properly, overwatering or underwatering, and failing to follow a proper fertilization schedule. Ensuring even coverage and consistent aftercare will help achieve the best results.
Is hydroseeding safe for pets and children?
Yes, hydroseeding is generally safe for pets and children. However, it is advisable to keep them off the treated area for at least 2–3 weeks to allow the grass to establish. Some fertilizers or tackifiers may contain mild irritants, so checking product labels and using pet-safe options is recommended.
Conclusion
Deciding whether DIY hydroseeding is right for you comes down to your budget, time, and willingness to put in a bit of effort. The biggest advantage is its cost-effectiveness, allowing homeowners to achieve a lush, green lawn at a fraction of the price of professional services. It’s also an efficient method that ensures even seed distribution, faster germination, and better moisture retention compared to traditional hand-seeding. For DIY enthusiasts, hydroseeding can be a rewarding project, providing the satisfaction of watching a carefully prepared lawn flourish over time. However, success requires patience and proper maintenance—consistent watering, avoiding foot traffic too soon, and monitoring for weeds will make a significant difference in the final outcome. While it may take a few weeks to see full results, the long-term payoff is well worth it. If you’re looking for a practical and affordable way to transform your outdoor space, hydroseeding is a great option to consider. With the right preparation and care, you can enjoy a vibrant, thriving lawn that enhances your property for years to come.